Tomato Cerise
$4.95
Lycopersicon Esculentum
- Seed Count 40
- Ideal For Pots
- Annual
Out of stock
Email when stock available
Description
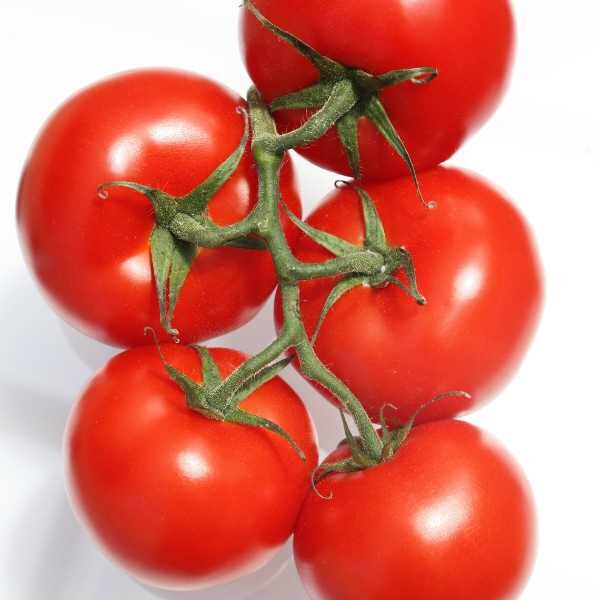
Tomato Cerise is an old heirloom Italian cherry-type tomato that produces a prolific crop of small bite-sized dark red tomatoes with an exceptionally sweet taste.
It is an early maturing variety and has good disease resistance.
Determinate, bush variety. Does not require staking.
Related Articles
| Method: Raise seedlings | Soil Temp: 16°C - 35°C |
| Cool Mountain: Oct - Dec | Position: Full sun |
| Arid: Aug - Mar | Row Spacing: 50 cm |
| Temperate: Aug - Dec | Planting Depth: 3mm |
| Sub Tropical: Aug - Jan | Harvest: 80 Days |
| Tropical: May - Jul | Plant Height: 1m |
Climate and Growing Conditions
Best Growing Seasons:
- In most regions of Australia, tomatoes generally thrive when planted from September to November (spring) and will produce through summer until April, depending on local climate.
- See individual climate zone information on the product description tab.
Ideal Temperature
- Tomatoes prefer daytime temperatures between 20-30°C.
- Nighttime temperatures should ideally be above 10°C to promote good fruit set.
Site Selection
Sunlight:
- Choose a location that receives at least 6-8 hours of full sunlight daily.
- Tomatoes grow best in warm, sunny spots.
Soil Type:
- Well-draining soil is crucial as tomatoes do not tolerate waterlogged conditions.
- Sandy loam or loamy soil enriched with organic material is ideal.
Soil Preparation
Soil Testing:
- Before planting, conduct a soil test to determine pH and nutrient levels.
Amending Soil:
- Amend the soil with compost or well-rotted manure.
- Aim for a pH level between 6.0 and 6.8 for optimal growth.
Loosening Soil:
- Work the soil to a depth of at least 30 cm and remove any debris or rocks.
Planting Instructions
Starting Seeds:
- Start seeds indoors 6-8 weeks before the last expected frost date or plant in situ in mid spring.
Transplanting:
- Harden seedlings by gradually exposing them to outdoor conditions for about a week before planting.
Spacing:
- Plant seedlings 60-90 cm apart to ensure adequate airflow and reduce the risk of diseases.
Watering Practices
Frequency:
- Water deeply and regularly, especially during dry periods. Aim for about 2-3 cm of water per week.
Method:
- Use a soaker hose or drip irrigation to avoid wetting the foliage and minimize the risk of fungal diseases.
Signs of Water Stress:
- Monitor for wilting leaves (indicating too little water) or cracking fruit (indicating too much water).
Nutrient Management
Fertilisation:
- Use a balanced fertiliser (with equal N-P-K values) at planting.
- As plants grow and start flowering, switch to a fertiliser higher in phosphorus (the middle number of N-P-K) to promote fruiting.
Organic Options:
- Consider organic fertilizers like fish emulsion or seaweed extract.
Growing Indeterminate vs. Determinate Tomatoes
Tomatoes come in two main growth habits—indeterminate and determinate—and understanding the difference is key to growing them successfully.
Indeterminate Tomatoes
Growth Habit:
- These tomatoes grow like wild vines, stretching taller and producing fruit all season until frost kills them.
- Think of them as the marathon runners of the tomato world.
What They Need:
- Strong Support: Indeterminates need tall, sturdy stakes, cages, or trellises about 2m tall.
- Letting them sprawl invites disease and wasted space.
- Pruning: Remove suckers (those little shoots between stems and branches) to focus energy on fruit production.
- A well pruned plant yields better air circulation and bigger tomatoes.
- Space: Give them room—plant at least 2–3 feet apart so they don’t turn into a tangled jungle.
Best For: Gardeners who want a long harvest and don’t mind a little maintenance
Determinate Tomatoes
Growth Habit:
- These grow to a set size of around 1m, produce all their fruit in a short window, and then call it quits.
What They Need:
- Moderate Support: A short cage or stake is usually enough—they’re bushier but not as wild as indeterminates.
- Less Pruning: Leave the suckers alone.
- These plants are programmed to stay compact, so over pruning can reduce yield.
- Space: Plant 50cm apart. They’re good for small gardens or containers.
Best For: Busy gardeners, container growers, or those who want a big harvest all at once.
The Bottom Line
Indeterminates = Keep growing, keep producing, need training.
Determinates = Grow to size, fruit all at once, low maintenance.
Pest and Disease Management
Common Pests:
- Aphids: Small, green bugs that suck sap. Control them with insecticidal soap.
- Whiteflies: Small, flying pests; use yellow sticky traps to catch them.
- Tomato Hornworms: Large caterpillars that can defoliate plants.
- Handpick them off or use Dipel (Bacillus thuringiensis).
Diseases:
- Blight: Watch for yellowing leaves and brown spots. Ensure good air circulation and avoid overhead watering.
- Powdery Mildew: Look for a white powdery substance on leaves. Improve air circulation and treat with fungicides if necessary.
Pruning and Supporting Plants
Pruning:
- Regularly remove suckers (small shoots between the main stem and branches) to encourage better air circulation and direct energy to fruit production.
Support:
- Use cages or stakes to support indeterminate varieties, which continue to grow throughout the season, preventing fruits from touching the ground.
Harvesting and Storage
Timing:
- Harvest tomatoes when they’re fully coloured and slightly firm.
- Most tomatoes will ripen on the vine; pick them just before full ripeness in very hot conditions.
Storage:
- Store harvested tomatoes at room temperature, away from sunlight, for optimal flavour and texture.
- Avoid refrigerating as it can change the texture and flavour.
Blossom End Rot
Overview:
- Blossom end rot is a common physiological disorder that affects tomatoes and other fruits, characterized by a dark, sunken spot on the blossom end of the fruit.
- It is not a disease caused by pathogens but rather a symptom of nutrient imbalance and environmental stress.
Causes:
- Calcium Deficiency: The primary cause of blossom end rot is a lack of calcium in the developing fruit. Calcium is essential for cell wall structure and growth.
- Inconsistent Watering: Fluctuations in soil moisture can inhibit the plant’s ability to uptake calcium. Periods of drought followed by heavy watering can exacerbate the problem.
- High Nitrogen Levels: Excessive nitrogen fertilization can promote leafy growth at the expense of fruit development, leading to calcium deficiency in the fruit.
- Soil pH and Conditions: Soil with low pH or poor drainage can affect calcium availability in the soil.
Symptoms:
- Dark, sunken spots usually appear at the blossom end (the bottom) of the fruit.
- The affected area often becomes soft, and the fruit may rot if not harvested promptly.
- Symptoms tend to occur on the first few fruits developed on the plant, particularly during the early fruiting stage.
Prevention
Soil Testing:
- Conduct a soil test to determine pH and nutrient levels before planting.
- Aim for a pH between 6.0 and 6.8.
Consistent Watering:
- Maintain even soil moisture by watering regularly, especially during dry spells.
- A deep watering once a week is better than shallow, frequent watering.
Balanced Fertilization:
- Use a balanced fertilizer, being cautious not to over-fertilize with nitrogen.
- A fertilizer high in phosphorus (the middle number in N-P-K) can help promote healthy fruit development.
- Consider also using calcium supplements like gypsum or lime if needed.
Mulching:
- Mulch around the base of the plants with organic material to help retain moisture and stabilize soil temperature.
Remove Affected Fruits:
- While you can’t save the already affected fruits, removing them can help the plant redirect energy toward developing healthy fruit.
Postage Charge
Orders under $30 attract a $4.95 shipping charge. Orders $30 and above have free shipping.
Order Times
Seed orders are normally dispatched within three business days. You will receive an email when seeds are mailed out.
Postage Days
Seeds are mailed out Monday to Friday at 1pm. Except for the Friday of long weekends.
Postage Times
WA 2-3 Days: SA,NT 3-5 Days: NSW, ACT, QLD, VIC: 5-7 Days
Carrier
We use Australia Post Letter Postage for the majority of orders
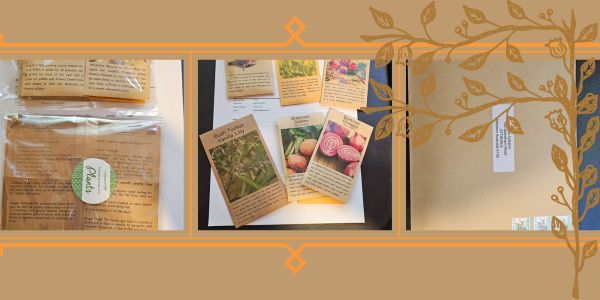
Not only are our seeds packed in recycled paper envelopes, we keep the theme going when we post out website orders. To protect your seeds from moisture and the letter box munchers (snails), we use a very special plastic free material made from plants. They are then put into recycled mailing envelopes. Green all the way 💚🌿
🌿 Growing Dill from Seed
Dill is one of those herbs that quietly wins hearts—its delicate fronds, bright aniseed flavour, and versatility in the kitchen make it a rewarding crop for any garden. Whether you’re growing it for pickles, salads, or to attract beneficial insects, starting dill from seed is a breeze once you know its preferences.
Let’s walk through it all—from sowing to seed saving—so you can grow a healthy, bountiful crop of dill in your Australian garden.
🌱 Sowing Dill: In Trays vs. Direct in the Garden
Dill has a taproot, which makes it a little fussy about being transplanted. So while you can sow it in trays, direct sowing is usually best if you want happy, productive plants.
🌼 Direct Sowing (Preferred)
- When: Early spring through early autumn in most climates. In warmer northern areas, it can be grown year-round.
- How: Sow seeds directly 3mm deep, spaced about 15-20cm apart. Thin seedlings to allow airflow and avoid crowding.
- Tips: Keep the soil moist during germination (7–21 days). Sow successively every 3–4 weeks for a steady supply.
🌱 Sowing in Trays (If Needed)
- Why: If you’re growing in containers or need a head start.
- How: Use deep seedling trays or biodegradable pots. Transplant gently when seedlings are small (under 5cm tall) to reduce root disturbance.
🌟 Gardener’s Tip: If you must transplant, water well before and after moving, and avoid disturbing the root ball too much.
🌞 Soil and Position
Dill isn’t too fussy, but it does best when its few basic needs are met.
🌿 Soil
- Type: Loose, well-drained soil rich in organic matter.
- pH: Slightly acidic to neutral (6.0–7.0).
- Prep: Mix compost or well-rotted manure through the topsoil before sowing.
☀️ Position
- Sunlight: Full sun (at least 6 hours/day).
- Wind: Dill can grow tall and wispy—plant it in a sheltered spot or near a support structure.
- Containers: Grows well in large pots if watered regularly and given enough sun.
🌟 Gardener’s Tip: Dill’s fine roots don’t like soggy feet, so avoid heavy clay or boggy areas.
🧑🌾 Care and Maintenance
Dill is generally low-maintenance once it’s settled in, but a little care goes a long way.
💧 Watering
- Water regularly during dry periods, especially in containers.
- Avoid overwatering—dill prefers a light hand.
🌿 Feeding
- Light feeders—just add compost at planting.
- If you’re harvesting heavily, a light liquid feed mid-season can help.
✂️ Pinching and Pruning
- Pinch back the main stems early to encourage bushier growth.
- Let some plants flower if you’re after seeds or want to feed beneficial insects.
🌟 Gardener’s Tip: Deadhead flowers if you want more leaf growth and less self-seeding.
🌻 Companion Planting Guide
Dill is a team player in the garden, with strong benefits for pest management and pollinator attraction.
🌼 Good Companions
- Brassicas (like cabbage, kale, and broccoli): Dill repels cabbage moths and aphids.
- Cucumbers: Naturally complementary in the garden and kitchen.
- Lettuce: The light dill canopy can offer dappled shade as it grows.
- Onions and garlic: A great team for pest control.
🌿 Plants to Avoid
- Carrots: Competes with them as they’re in the same family.
- Tomatoes: Young dill can help repel pests, but mature dill may inhibit tomato growth—remove before flowering.
🌟 Gardener’s Tip: Let a few dill plants flower near your veggie patch—they attract lacewings, ladybirds, and hoverflies, all hungry for aphids!
✂️ Harvesting Dill
Harvesting dill is one of the best parts—it grows quickly, and the more you cut, the more it gives.
🍃 For Leaves
- Begin harvesting leaves once plants are 20cm tall.
- Snip off outer fronds with clean scissors, ideally in the morning for best flavour.
- Use fresh or dry for storage (hang small bunches upside down in a well-ventilated area).
🌼 For Flowers
- Harvest the flower umbels just before full bloom for floral arrangements or culinary use (especially pickling).
🌾 For Seeds
- Wait until the seed heads turn brown and begin to dry on the plant.
- Snip off entire heads into a paper bag and let them dry fully indoors.
🌟 Gardener’s Tip: Dill leaves and seeds have slightly different flavours—leaves are grassy and fresh, while seeds are warm and slightly bitter.
🐛 Common Issues and Fixes
Dill is generally pest-resistant, but here are a few hiccups you might come across:
| Problem | Symptoms | Fix |
|---|---|---|
| Aphids | Clusters on stems and buds | Blast off with water, encourage beneficial insects |
| Powdery mildew | White, dusty coating on leaves | Space out plants for airflow, avoid overhead watering |
| Bolting too early | Premature flowering in hot weather | Sow in cooler months or partial shade in summer |
| Leggy growth | Plants stretch and flop over | Ensure full sun, pinch early to promote bushiness |
🌟 Gardener’s Tip: Don’t worry too much if some plants bolt—just let them flower and go to seed. Pollinators will thank you!
🌾 Seed Saving Guide
Saving dill seed is simple and rewarding—and once you do it once, you’ll probably never need to buy seeds again.
✨ When to Collect
- Wait for the seed heads to dry on the plant—brown and papery, but not brittle.
- Seeds should be fully formed and easy to shake off when rubbed.
✂️ How to Collect
- Cut entire seed heads and place them in a paper bag or bowl.
- Leave in a dry, airy spot to cure for 1–2 weeks.
- Shake or rub to release seeds, then winnow (blow away) the chaff.
🏺 Storage
- Store in a cool, dry place in an airtight container or paper envelope.
- Label with date—dill seeds are viable for 3–5 years if kept well.
🌟 Gardener’s Tip: Choose the best, most vigorous plants to save seed from, and you’ll gradually develop a dill that thrives in your own garden’s microclimate.
🌼 Final Thoughts
Dill is the kind of herb that quietly fills many roles in a garden—it’s flavourful, fragrant, beautiful, and beneficial. Whether you’re dotting it among veg for pest control, tucking it into pots on the balcony, or letting it tower with its lacy blooms in a cottage-style border, it’s one of those plants that gives more than it takes.
Start with just a patch this season—you might find yourself saving seed and growing it year after year. And if it self-seeds and pops up in random places? That’s okay—it’s all part of the learning, and dill doesn’t mind a bit of spontaneity in your garden.


Just planted