


Bean Gourmet Delight
$4.95
Phaseolus Vulgaris var. Nanus
- Seed Count 15
- Very Adaptable
- Annual
In stock
Description
The bush bean Gourmet Delight is one of the best stringless varieties, producing succulent, round, crisp pods in great abundance. 15cm long pods that are great to munch on raw, eat freshly steamed or freeze for a later date.
Adapts well to most growing conditions and as it does not need staking it is an ideal candidate for pots.
Beans do much better when they are directly sown. Bush beans are determinate, meaning they grow to about a meter tall, blossom, turn out a single harvest of beans and then die.
If you want a large crop to be ready almost all at once for preserving or freezing, sow all of the seeds at the same time. If you want a higher, continuous yield throughout the season, succession plant at an interval 10 to 20 days.
| Method: Sow direct | Soil Temp: 16°C - 30°C |
| Cool Mountain: Oct - Dec | Position: Full sun |
| Arid: Sep - Jan | Row Spacing: 20cm |
| Temperate; Sep - Jan | Planting Depth: 10mm |
| Sub Tropical: Aug - Apr | Harvest: 70 Days |
| Tropical: Apr - Jul | Plant Height: 1m |
🥚 Sowing Bush Beans – In Trays vs Direct
Bush beans grow best direct-sown into your garden beds—but there are situations where sowing in trays might be helpful.
Direct Sowing (Best Method)
Bush beans prefer to go straight in the ground because they don’t love having their roots disturbed. Their taproots grow quickly and like to dig deep, so transplanting can stress them.
Sow the seeds 2–3cm deep, spaced 10–15cm apart, with rows about 30–40cm apart. Keep the soil moist until germination, which typically takes 7–10 days in warm conditions.
Sowing in Trays (Only if Necessary)
If you’re in a cooler climate or have heavy rains at planting time, you can start them in biodegradable pots or deep cell trays to avoid disturbing the roots when transplanting. Be sure to move them into the ground as soon as they’ve got a couple of true leaves and before they get rootbound.
🧼 Is Seed Pre-Treatment Required?
No special seed pre-treatment is needed for bush beans. But if your seeds are a bit old, soaking them for 4–6 hours in room-temperature water can speed up germination a touch. Just don’t leave them too long or they can rot.
🌞 Soil & Position
Bush beans are sunshine lovers and thrive in full sun—aim for at least 6–8 hours of direct light per day.
Soil Tips:
- Free-draining soil is key—beans hate wet feet.
- A neutral to slightly acidic pH (6.0–6.8) is ideal.
- Mix in well-rotted compost or aged manure before sowing, but avoid high-nitrogen fertilisers—they’ll promote leaf growth over pods.
In no-dig gardens, just pull back the mulch and sow directly into compost-rich soil. Once they’re up, you can mulch around them to retain moisture and suppress weeds.
🧑🌾 Care & Maintenance
Bush beans are low fuss, but a little attention helps them really shine:
- Watering: Keep the soil evenly moist during flowering and pod set. Water at the base to avoid fungal issues.
- Mulching: A layer of straw or sugarcane mulch helps keep moisture in and weeds down.
- Feeding: Beans are nitrogen-fixers, so they don’t usually need extra fertiliser—though a light feed of seaweed tonic during flowering can help with pod development.
- Support: Most bush beans don’t need staking, but a low trellis or twiggy branches can help if they get top-heavy with pods.
🌼 Companion Planting
Bush beans play nicely with lots of garden favourites! Here are some of the best and worst companions:
Good Companions:
- Corn – Beans fix nitrogen, which corn loves.
- Cucumber – They share similar needs and grow well together.
- Strawberries – Beans help feed the soil without overshadowing the berries.
- Carrots – They grow at different soil depths and don’t compete.
Avoid Planting With:
- Onions, garlic, leeks – These can stunt bean growth.
- Fennel – A poor neighbour for most veggies.
✂️ Harvesting
Bush beans are usually ready to pick about 7–9 weeks after sowing, depending on the variety and conditions.
How to Harvest:
- Pick pods when they’re young and crisp, around 10–15cm long.
- Use two hands to gently snap them off to avoid damaging the plant.
- Keep harvesting regularly—every few days—to encourage more pods.
You can eat them fresh, steamed, or even pickle them! And if you let a few pods mature and dry, you can save seed for next season.
🐛 Common Issues & Fixes
| Problem | Likely Cause | Fix |
|---|---|---|
| Yellowing leaves | Overwatering or poor drainage | Improve drainage and reduce watering. Add mulch to balance moisture. |
| Leaves eaten or holes | Slugs, snails, or caterpillars | Use beer traps, crushed eggshells, or handpick pests early morning. |
| Poor pod production | Too much nitrogen or lack of pollinators | Avoid nitrogen-heavy feeds. Encourage bees with flowers nearby. |
| Plants wilting suddenly | Root rot or bacterial wilt | Ensure soil drains well. Avoid watering in late afternoon. |
| Rusty spots on leaves | Fungal disease (rust) | Remove affected leaves. Improve air circulation. Use organic sprays. |
🌾 Seed Saving Guide
Saving bush bean seeds is wonderfully easy—just let some pods fully mature and dry on the plant.
Steps:
- Select your healthiest plants for seed saving.
- Let pods stay on the plant until they’re brown and brittle.
- Pick and shell the pods once completely dry.
- Store seeds in a cool, dry, dark place—an envelope or jar works well.
- Label with variety and date. They’ll stay viable for 3–5 years.
Tip: Make sure you’re only saving from open-pollinated (heirloom) varieties—not hybrids—so they grow true to type next season.
🌟 Final Thoughts
Bush beans are one of those crops that really reward the gardener. They’re quick, generous, and great for improving the soil as they go. Whether you’re growing a few rows for a summer side dish or succession planting every few weeks for a steady supply, these little legumes are a garden staple worth making room for.
And remember—don’t be discouraged if your first sowing doesn’t go perfectly. Beans are forgiving, and every season is a fresh start. 🌿
5 reviews for Bean Gourmet Delight
| 5 star | 100% | |
| 4 star | 0% | |
| 3 star | 0% | |
| 2 star | 0% | |
| 1 star | 0% |

Postage Charge
Orders under $35 attract a $4.95 shipping charge. Orders $35 and above have free shipping.
Order Times
Seed orders are normally dispatched within three business days. You will receive an email when seeds are mailed out.
Postage Days
Seeds are mailed out Tuesday to Friday at 1pm. Except for the Friday of long weekends.
Postage Times
WA 2-3 Days: SA,NT 3-5 Days: NSW, ACT, QLD, VIC: 5-7 Days
Carrier
We use Australia Post Letter Postage for the majority of orders
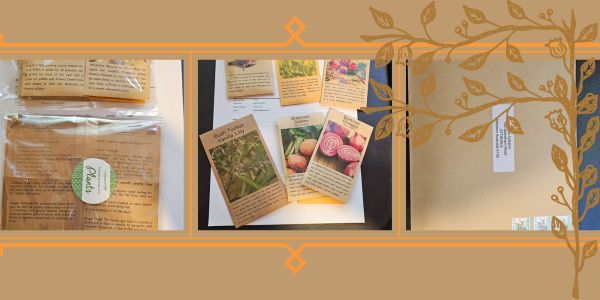
Not only are our seeds packed in recycled paper envelopes, we keep the theme going when we post out website orders. To protect your seeds from moisture and the letter box munchers (snails), we use a very special plastic free material made from plants. They are then put into recycled mailing envelopes. Green all the way 💚🌿
Delivery Guarantee
We take great care to make sure your seeds arrive safely. If your order is lost or damaged in transit, we’ll happily send a replacement. Unfortunately, we can’t replace or refund orders that arrive later than the estimated delivery date, as delays can sometimes occur that are outside our control.
Please note that all dispatch and delivery times listed are estimates only. While we do our best to post promptly, delivery timeframes can vary due to postal service delays, weather events, or other unforeseen circumstances. We’re unable to take responsibility for any loss, damage, or cost that results from a late delivery.
An order is not considered missing until at least 20 business days have passed from the postage date. You’ll receive an email once your seeds have been posted, letting you know they’re on their way. If you don’t see it in your main inbox, please check your Spam or Promotions folders as sometimes our emails like to hide there.

See all our verified customer reviews on our official CusRev profile.
100% as described. I am yet to plant them.
See all our verified customer reviews on our official CusRev profile.
See all our verified customer reviews on our official CusRev profile.
See all our verified customer reviews on our official CusRev profile.
See all our verified customer reviews on our official CusRev profile.